How to Wrap Elements with JavaScript
JavaScript is an incredibly versatile language, isn’t it? You can manipulate web pages in real time, create interactive content, and even wrap elements. But wrapping elements with JavaScript can seem a bit tricky if you’re new to it.
Don’t worry, we’ve got you covered. We’ll explore a simple, efficient way to wrap elements using JavaScript. By the time you finish reading, you’ll be wrapping elements like a pro. Let’s dive right in!
In this post, we will be looking at the following 3 ways to wrap elements with JavaScript:
- By using the createElement() and appendChild() methods
- By using the insertAdjacentHTML() method
- By using the innerHTML property
Let’s explore each…
#1 – By using the createElement() and appendChild() methods
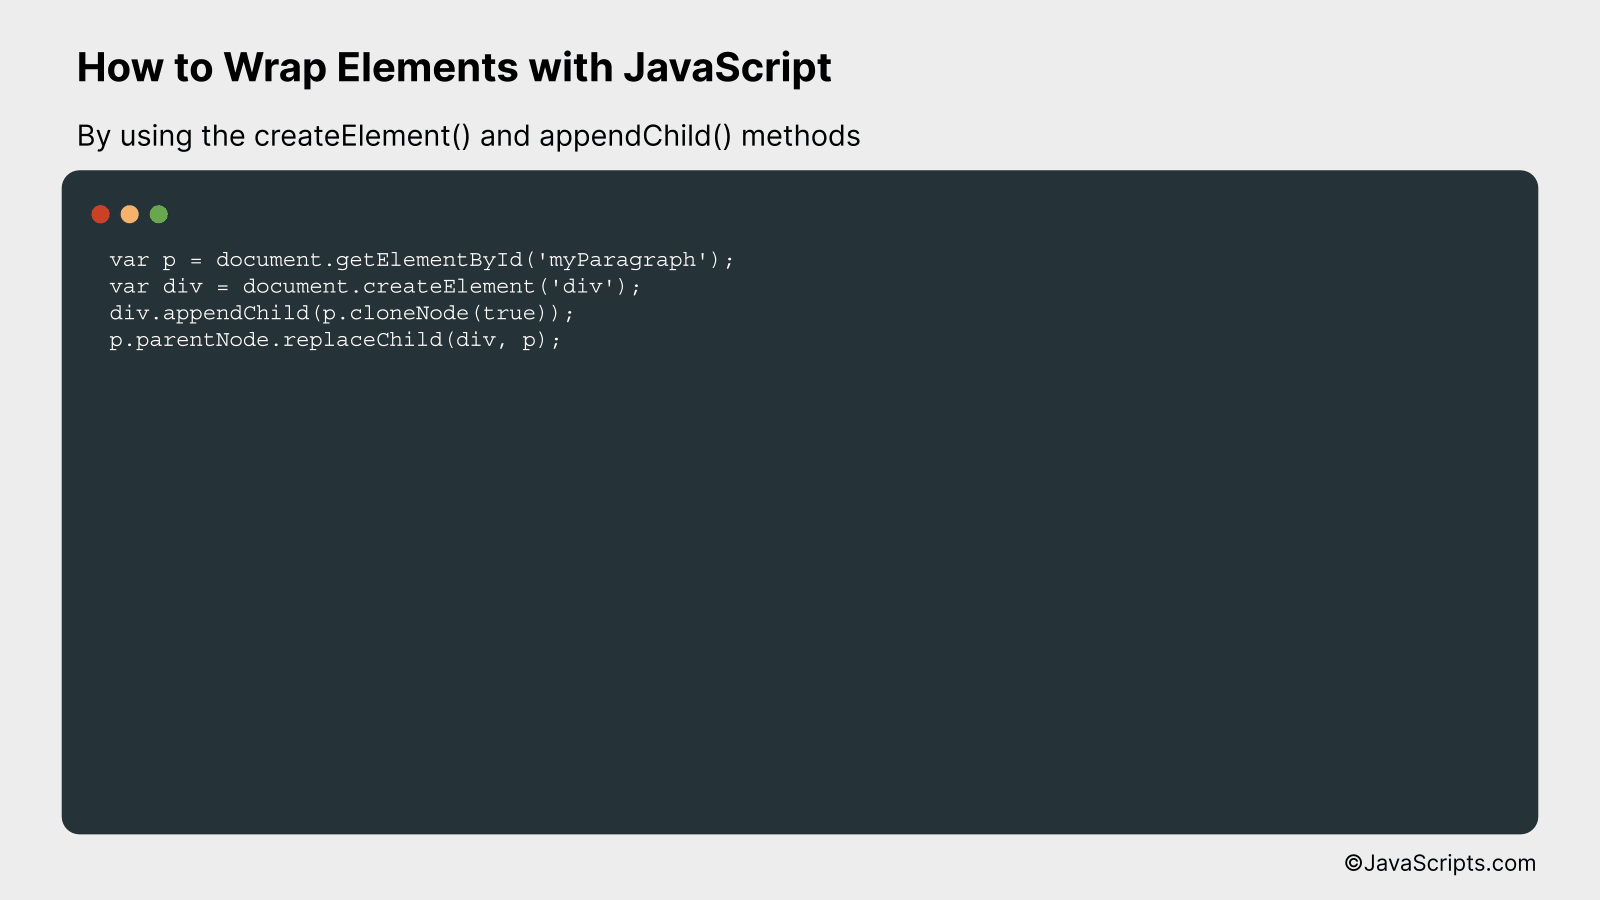
In JavaScript, the createElement() method is used to create a new element, while the appendChild() method is used to attach this newly created element to the DOM. This is effectively wrapping the original element in the new element. The following example demonstrates how to wrap a paragraph (p) element within a div.
var p = document.getElementById('myParagraph');
var div = document.createElement('div');
div.appendChild(p.cloneNode(true));
p.parentNode.replaceChild(div, p);
How it works
In the code snippet above, we first identify the paragraph element we want to wrap with a div. We then create a new div element. We clone the original paragraph and append this clone to our newly created div. Finally, we replace the original paragraph with our newly created div, effectively wrapping the original paragraph with our div.
- The document.getElementById(‘myParagraph’) retrieves the paragraph element with the id ‘myParagraph’.
- The document.createElement(‘div’) creates a new div element.
- The p.cloneNode(true) creates a deep copy of the paragraph node, and the div.appendChild() appends this cloned node to the div.
- The p.parentNode.replaceChild(div, p) replaces the original paragraph in the DOM with the new div, which contains the cloned paragraph. Thus, the original paragraph is effectively wrapped with the new div.
#2 – By using the insertAdjacentHTML() method
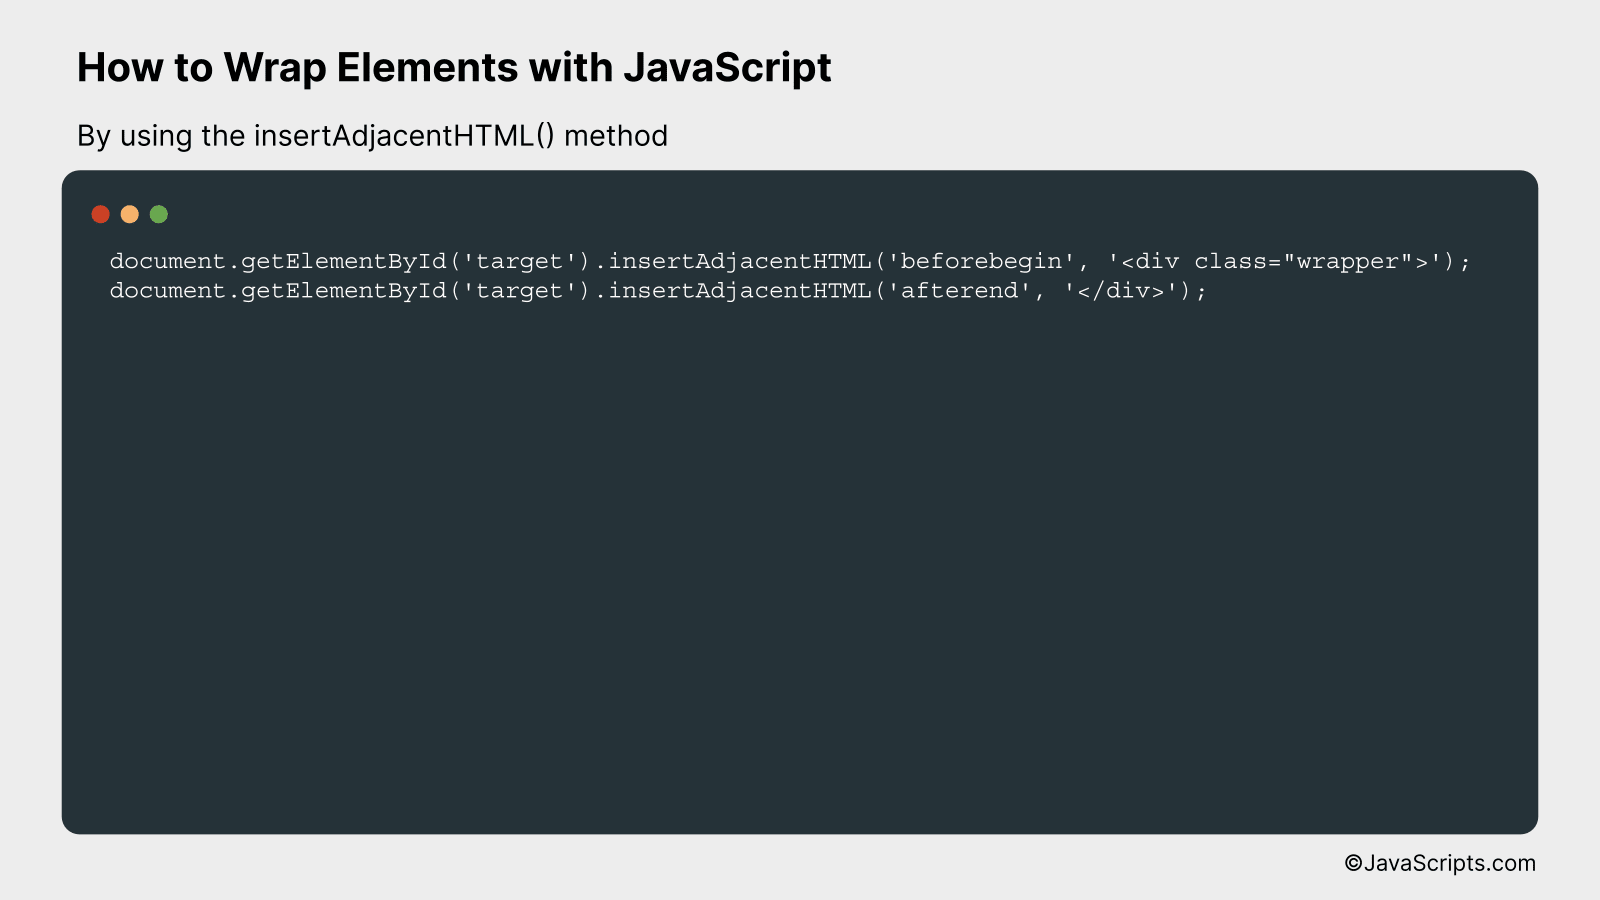
The insertAdjacentHTML() method in JavaScript is used to insert a given text as HTML at a specified position within an element. It’s a powerful tool for dynamically manipulating the structure of your webpage.
Here’s an example where we’re wrapping an existing element (with id: ‘target’) with a div.
document.getElementById('target').insertAdjacentHTML('beforebegin', '<div class="wrapper">');
document.getElementById('target').insertAdjacentHTML('afterend', '</div>');
How it works
The insertAdjacentHTML() method takes two arguments: a position and a string containing HTML, and inserts the HTML at the specified position relative to the element it’s invoked on. In this example, we’re adding opening and closing div tags before and after the targeted element respectively.
- The method
document.getElementById('target')is used to select the element with id ‘target’. - The
insertAdjacentHTML()method is then invoked on the selected element, inserting the opening div tag directly before the target element using the position ‘beforebegin’. - Similarly, the closing div tag is inserted directly after the target element using the position ‘afterend’.
- The net effect is that the target element gets wrapped inside a new div with the class ‘wrapper’.
#3 – By using the innerHTML property
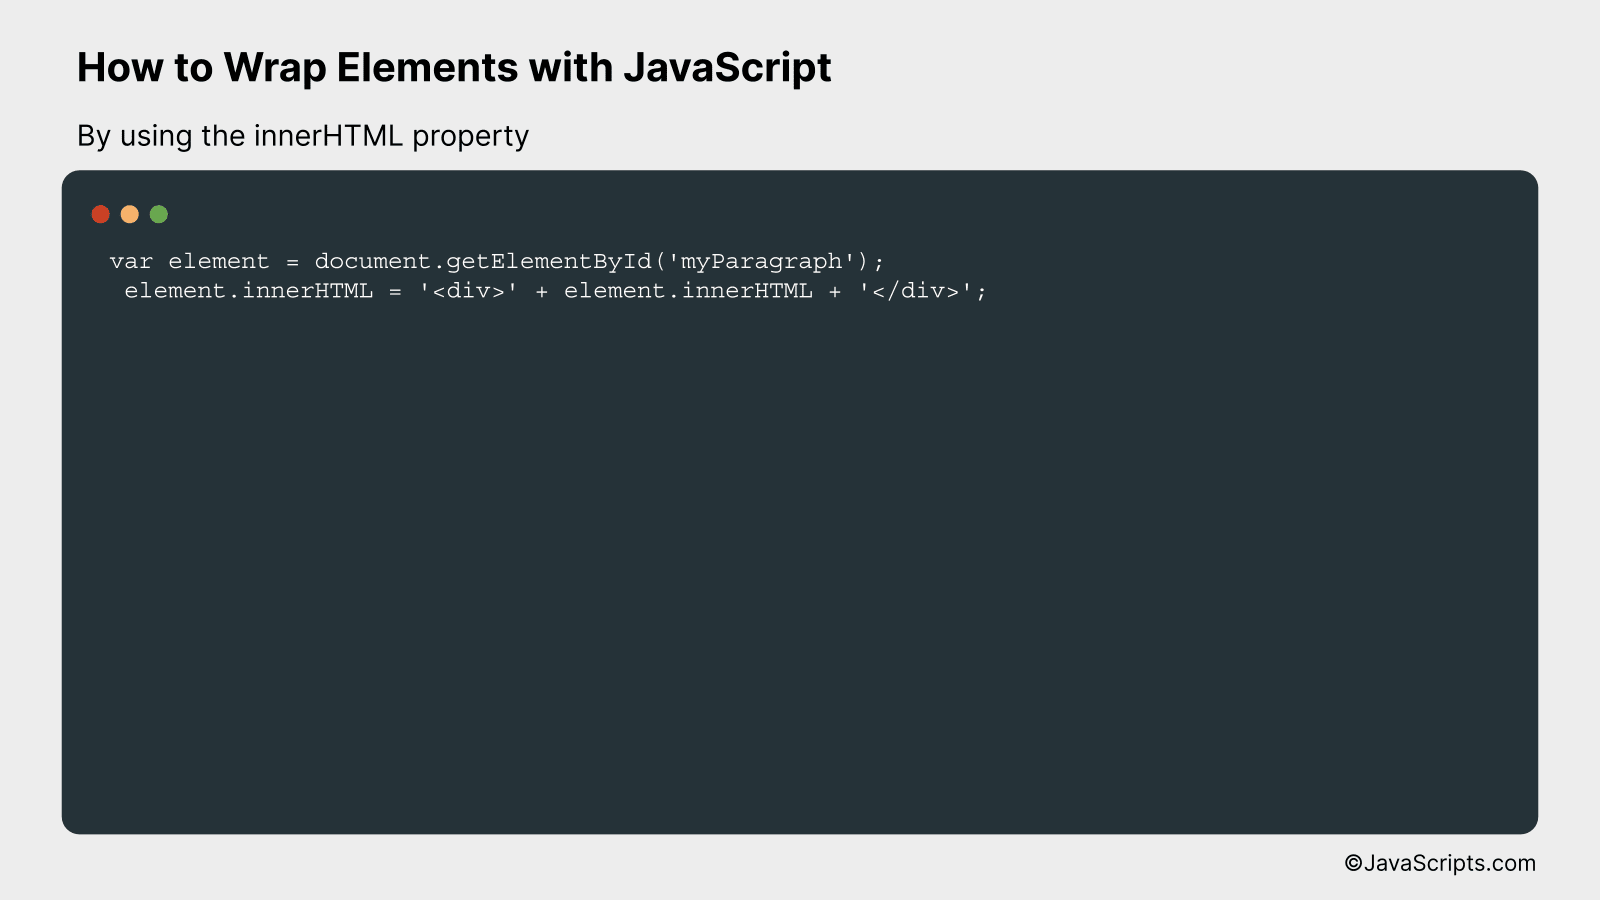
By leveraging the innerHTML property in JavaScript, one can manipulate the HTML content of an element. It allows you to wrap existing elements within new HTML tags. Consider an example where we have a paragraph and we wish to wrap it in a div tag.
 var element = document.getElementById('myParagraph');
 element.innerHTML = '<div>' + element.innerHTML + '</div>';
How it works
The code first finds the element we wish to wrap by using the document.getElementById() function. Then, it manipulates the HTML content of the selected element by wrapping it with the new HTML tags using the innerHTML property.
- First, the document.getElementById(‘myParagraph’) instruction is used to select the desired HTML element in our document by its ID. In this case, we’re selecting a paragraph element with ID ‘myParagraph’.
- Next, element.innerHTML retrieves the current HTML content of our selected paragraph.
- We then construct a new HTML string by wrapping the existing HTML content of our paragraph with div tags.
- Finally, we assign this new HTML string back to element.innerHTML, effectively replacing the original HTML content of our paragraph with the new, wrapped content.
Related:
- How to Sort Maps in JavaScript
- How to Replace Multiple Strings in JavaScript
- How to Remove a String from Another String in JavaScript
In wrapping up, mastering the art of wrapping elements with JavaScript is a valuable skill for any budding web developer. It helps in making your webpage more dynamic, ultimately enhancing user experience.
Remember, practice is key in learning this or any other coding technique. Keep trying out different ways to wrap elements. Before you know it, you’ll become a pro at it!