How to Move Elements with JavaScript
JavaScript, the programming language that adds life to static web pages, is a tool you can’t ignore. If you’ve ever wondered how to make your webpage elements dance, glide, or jump on your command, you’re in the right place.
Let’s demystify JavaScript for you and me, beginning with moving elements on a web page. Picture this: a button gliding across the screen when clicked or images sliding one after the other in a carousel. Ready to transform your web development skills with JavaScript? Let’s get started!
In this post, we will be looking at the following 3 ways to move elements with JavaScript:
- By appendChild() method
- By insertBefore() method
- By replaceChild() method
Let’s explore each…
#1 – By appendChild() method
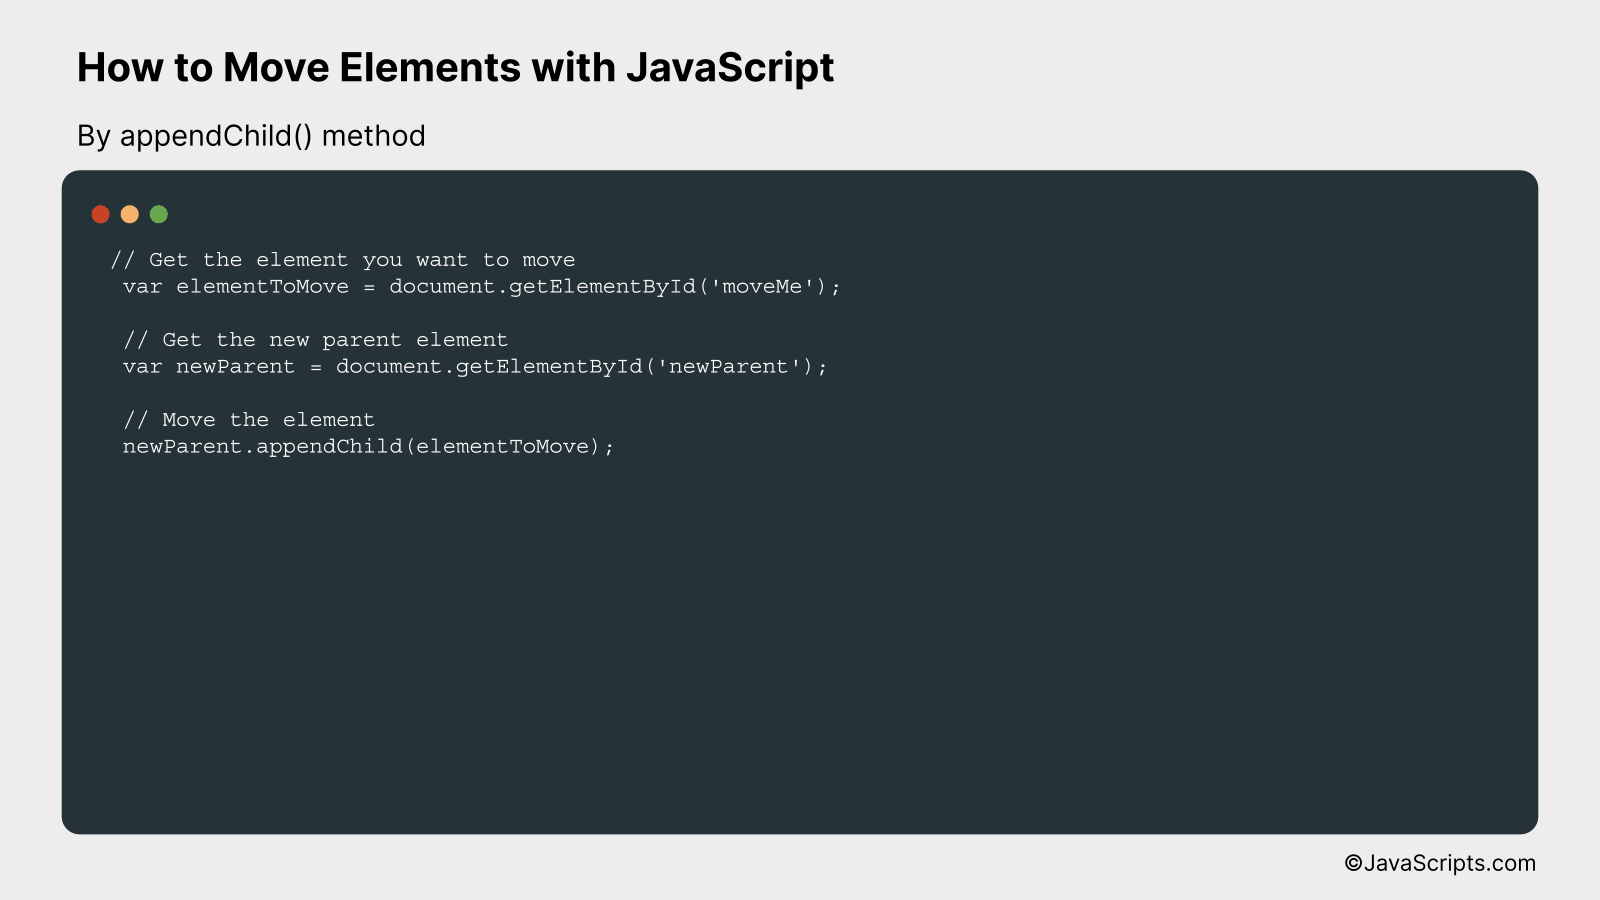
The appendChild() function in JavaScript allows us to move an element from one location to another in the DOM. This function essentially takes a node from its current position in the DOM and moves it to become the last child node of a specified parent node. Let’s understand this better with an example.
 // Get the element you want to move
 var elementToMove = document.getElementById('moveMe');

 // Get the new parent element
 var newParent = document.getElementById('newParent');

 // Move the element
 newParent.appendChild(elementToMove);
How it works
The appendChild() function works by removing the specified child node from its current parent node and adding it to the end of the list of child nodes of a specified parent node. If the child node already exists in the DOM, it will be removed from its current parent node before being appended to the new parent node.
- Step 1: Identify the element you want to move. We’re using the document.getElementById method to select the element with the id of ‘moveMe’.
- Step 2: Identify the new parent element. Here, we’re selecting the element with the id of ‘newParent’.
- Step 3: Use the appendChild() method to move the identified element to become the last child of the new parent element. If the element was already somewhere in the DOM, it will be removed from its previous location before being appended to the new parent.
#2 – By insertBefore() method
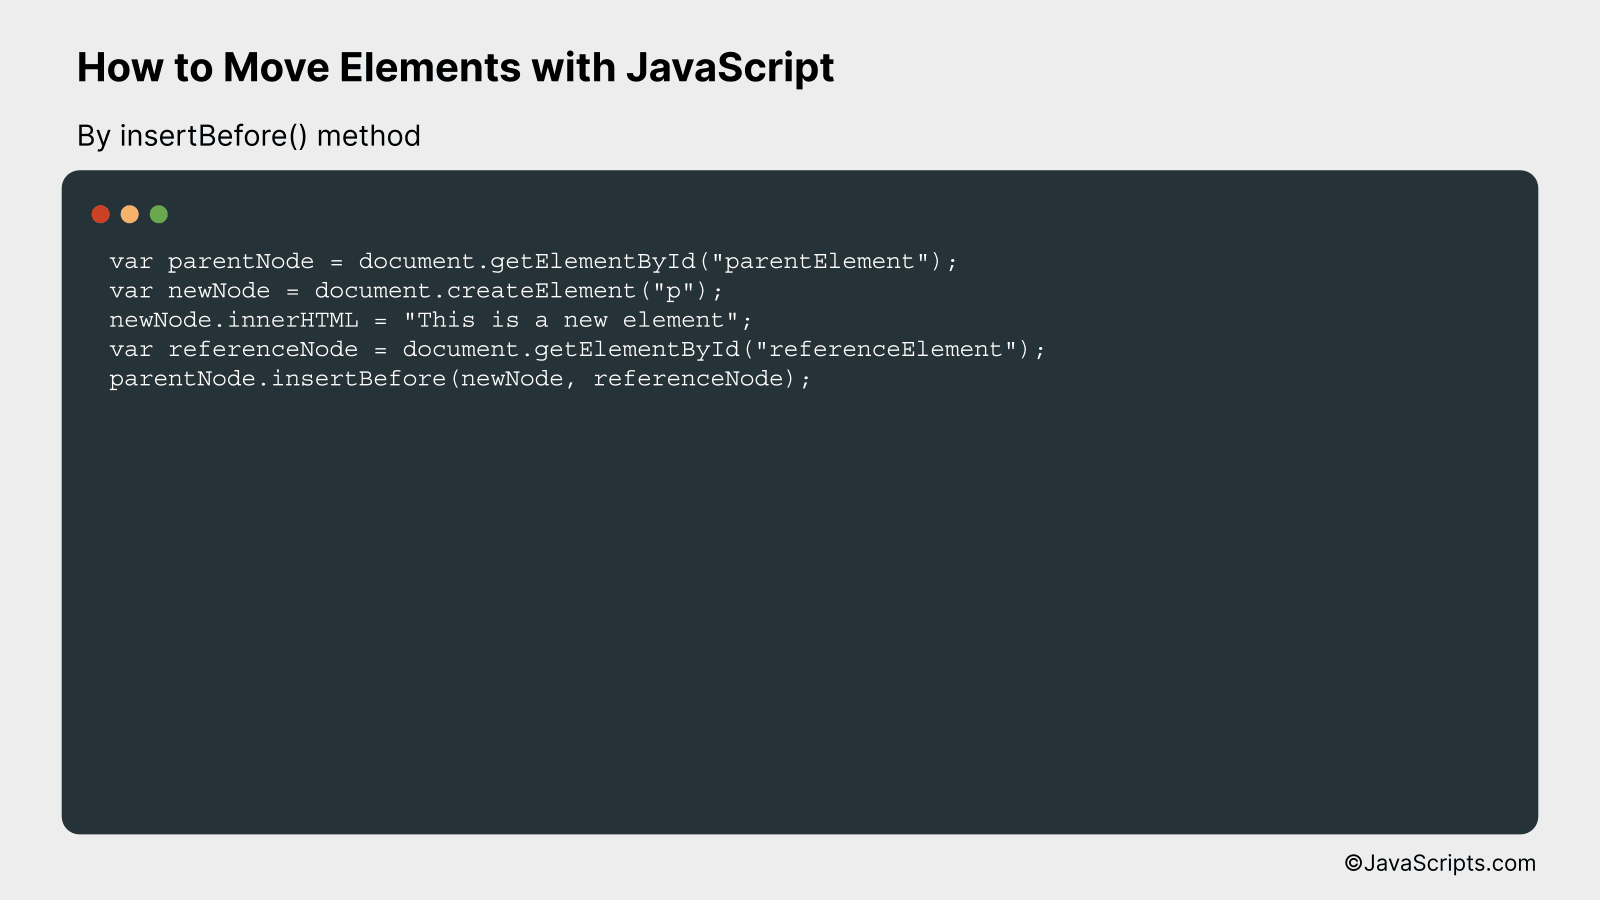
The JavaScript insertBefore() method can be used to insert a node (element) before another node within a parent node (element). This can be better understood with the help of an example.
var parentNode = document.getElementById("parentElement");
var newNode = document.createElement("p");
newNode.innerHTML = "This is a new element";
var referenceNode = document.getElementById("referenceElement");
parentNode.insertBefore(newNode, referenceNode);
How it works
The insertBefore() method inserts a node before a reference node as a child of a specified parent node. In the provided example, a new paragraph node is created and then inserted before a reference node in the parent node.
- First, we acquire the parent node by using the method document.getElementById() with the id of the parent node as a parameter.
- Next, we create a new node. In this case, it’s a paragraph element created with document.createElement(“p”). We set its innerHTML to “This is a new element”.
- We then get the reference node, again using the document.getElementById() method, with the id of the reference node as a parameter.
- Finally, we call the insertBefore() method on the parent node. We pass the new node and the reference node as arguments. This will insert the new node immediately before the reference node within the parent node.
#3 – By replaceChild() method
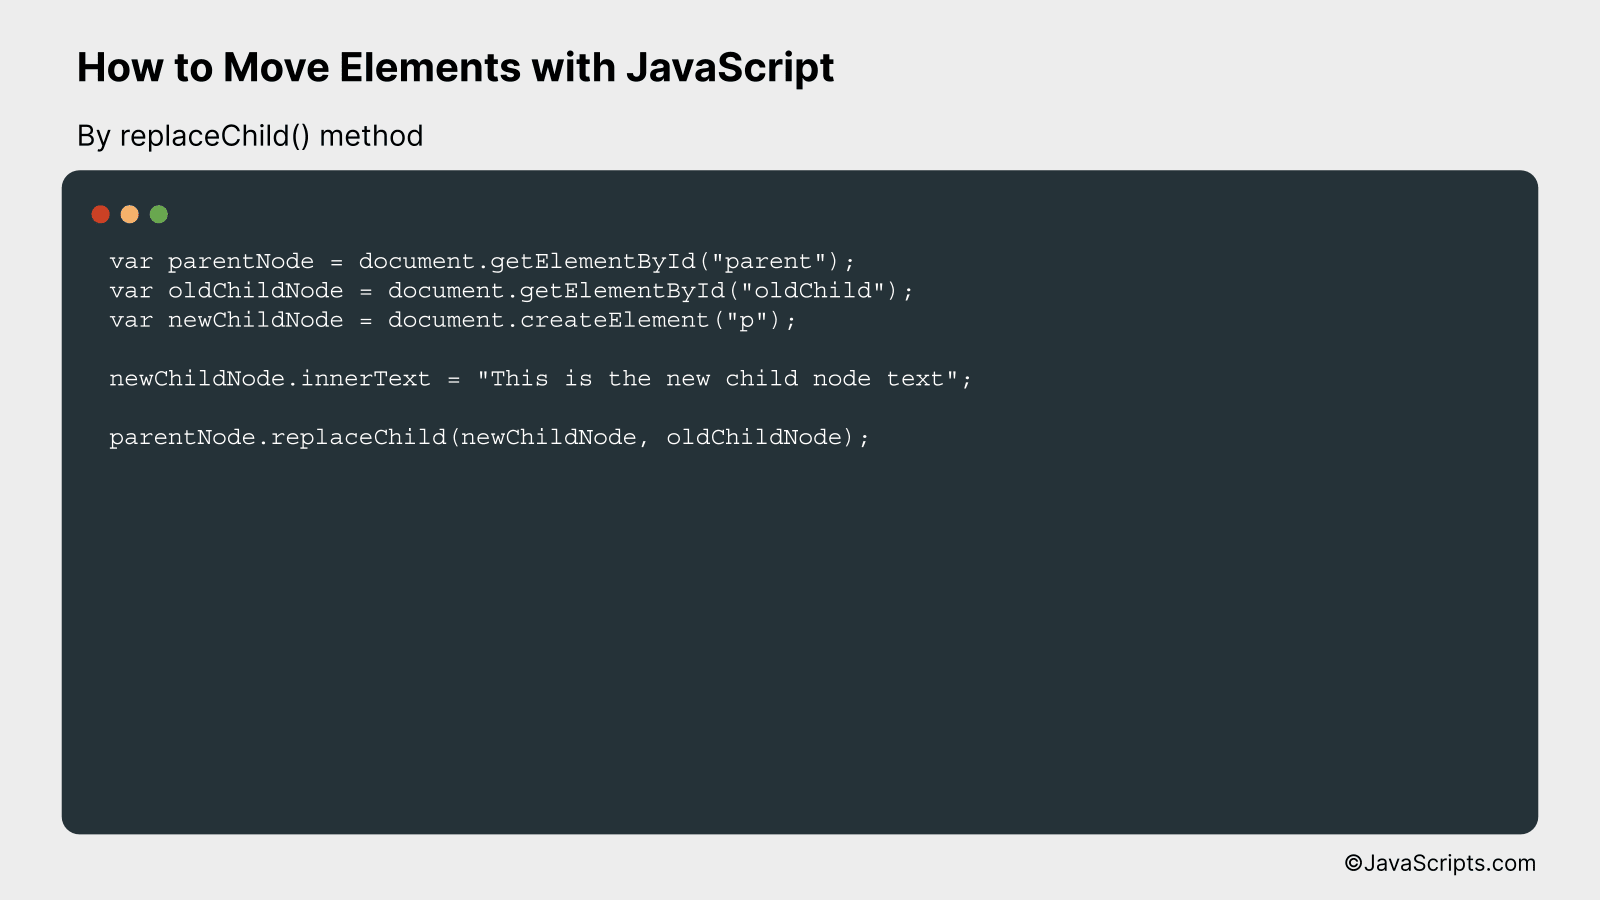
The replaceChild() method in JavaScript allows you to replace a child node with a new node in the HTML DOM. It effectively swaps out one node for another. Let’s understand this better with an example.
var parentNode = document.getElementById("parent");
var oldChildNode = document.getElementById("oldChild");
var newChildNode = document.createElement("p");

newChildNode.innerText = "This is the new child node text";

parentNode.replaceChild(newChildNode, oldChildNode);
How it works
The replaceChild() method works by targeting a parent node, and then replacing a specified child node of this parent with a new node. This change is directly reflected in the HTML DOM.
- First, we need to select the parent node. In our example, the parent node is selected using the method getElementById(“parent”) which selects the element with the id ‘parent’.
- Then, we select the old child node we want to replace. This is done using getElementById(“oldChild”) which selects the element with the id ‘oldChild’.
- Afterwards, we create the new node that we want to replace the old child with. This is done using the method createElement(“p”) which creates a new paragraph element. We set the inner text of this new node to “This is the new child node text”.
- Finally, we use the replaceChild(newChildNode, oldChildNode) method on the parent node. This method takes two arguments, the new child node and the old child node. It replaces the old child node with the new child in the parent node.
Related:
- How to Iterate over Key-Value Pairs in JavaScript
- How to Get Viewport Width in JavaScript
- How to Get the Domain from a URL in JavaScript
In conclusion, JavaScript provides us with a powerful toolbox to manipulate webpage elements with ease. Whether it’s moving items around, changing their appearance, or modifying their content, the possibilities are vast and interesting.
Remember to practice regularly, as mastering JavaScript requires time and patience. But once you’ve got the hang of it, you’ll discover that it’s a tool that can truly transform your web development projects.